| < Previous: How to Configure Jest to Test React and ES6 | Next: Using Jest to Test Our React Components > |
Creating our First React Test with Jest
The reason we had to name our test directory tests is because that's exactly what Jest looks for when it runs its test process: all JavaScript files in there are considered tests and will be executed.
So, we can put a very simple test into that folder, and npm run test will automatically find it, run it, and tell us the results. Let's start with an extremely simple test: does our List component render three repositories for users to click on?
Now, you probably think that's a silly thing to test because we can see it always renders exactly three repositories. But that's OK; you're just learning, and this is a bit of a forced example to help you get started. Create a new file in the tests directory called List-test.js and give it this content:
__tests__/List-test.js
jest.autoMockOff();

import React from 'react';
import ReactDOM from 'react-dom';
import TestUtils from 'react-addons-test-utils';

const List = require('../src/pages/List').default;

describe('List', () => {
    it('renders three repo links', () => {
        const rendered = TestUtils.renderIntoDocument(
            <List />
        );

        const repos = TestUtils.scryRenderedDOMComponentsWithTag(rendered, 'li');

        expect(repos.length).toEqual(3);
    });
});
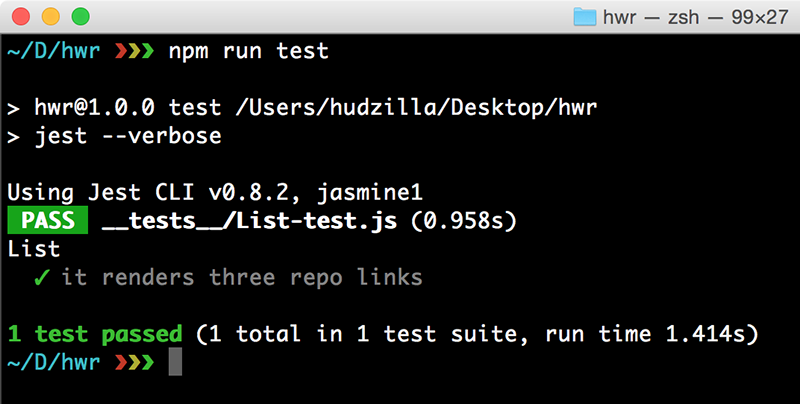
That's almost all new code so I want to explain it all to you. But first, save that file then run the test by using npm run test. You should see output like this:
Using Jest CLI v0.8.2, jasmine1
 PASS  __tests__/List-test.js (1.036s)
List
  ✓ it renders three repo links
The test was successful! That's no great surprise, as I already said, but at least it shows you have Jest set up correctly.
Let's talk through all the code in that file, because you've seen only a few lines of it before:
- jest.autoMockOff() Disables one of Jest's most powerful features, known as mocking. Without this line, Jest will silently replace any library we try to use with a fake version suitable for testing. This is extremely helpful when you're past beginner status, but right now it's just going to confuse you so we turn it off.
- import TestUtils from 'react-addons-test-utils'; React's test utility library gives us the ability to render React components into a fake document that can then be checked to make sure it looks how we think it ought to.
- const List = require('../src/pages/List').default loads our List component. This is an annoyance related to the way Babel and Jest work together and does the same as our previous
import List from './pages/List'code. - describe('List', () => { starts a test suite, which is a group of related tests. In this tutorial we'll have one test suite per React component.
- it('renders three repo links', () => { starts a test spec. Each test spec has a description ("renders three repo links") and some code attached to it (everything after the
{). - const rendered = TestUtils.renderIntoDocument converts some JSX into a virtual document that we can examine. We pass in
<List />so that it renders our List component. - const repos = TestUtils.scryRenderedDOMComponentsWithTag(rendered, 'li') searches through our virtual document for all
<li>elements, and returns them in an array. - expect(repos.length).toEqual(3) checks that the number of
<li>elements that were found matches the number 3 – i.e., that three<li>elements exist on the page.
That's a raw description of what the code does, but three things deserve further clarification.
First, Jest encourages you to use natural language to express what you're trying to test and why. This is part of the behavior-driven development approach, and it's important because it forces you to focus on what you're trying to test rather than how it works. So, we can read each test out loud: "it renders three repo links".
Second, the method scryRenderedDOMComponentsWithTag() has a curious name. "Scry" (which rhymes with "cry", if you were wondering) is an archaic word meaning "to gaze into a crystal ball", i.e. fortune telling. Clearly hipsters are intent on making it cool once more, so you can scry into your rendered document to look for things.
Third, we tell Jest what we expect to happen using its expect() function. Again, this is designed to be read aloud like plain English: "expect repos length to equal 3." If this expectation is matched (i.e., if our component outputs three repos) then the test is considered a success. Any variation from the expected result is considered a test failure.

Buy the book for $10
Get the complete, unabridged Hacking with React e-book and take your learning to the next level - includes a 45-day no questions asked money back guarantee!
If this was helpful, please take a moment to tell others about Hacking with React by tweeting about it!
| < Previous: How to Configure Jest to Test React and ES6 | Next: Using Jest to Test Our React Components > |
Copyright ©2016 Paul Hudson. Follow me: @twostraws.